Transition safely from air to ground. | | Every takeoff requires a landing. |
- Weight on wheels
- Touchdown energy
- Approach and glideslope
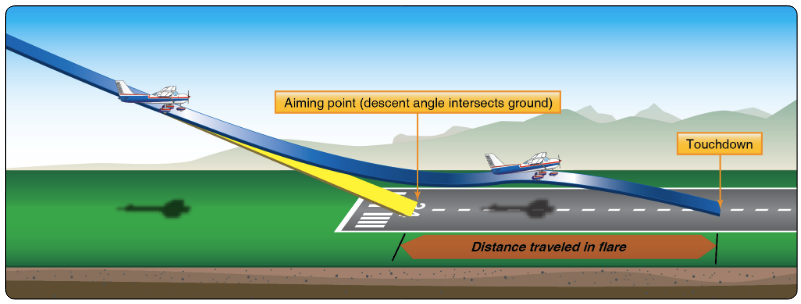
- Aiming point
- Power controls altitude, pitch controls airspeed
- Ground effect
- Flare: trade airspeed for altitude
- Rollout and braking
- Wind correction
| 
|
- Pre-landing checklist (GUMPS)
- Abeam touchdown: 12" MP, 90 knots, 10° flaps
- Base: 20° flaps, 75 knots
- Final: 40° flaps, 70 knots, stable approach
- At 10–20' above runway: Flare, reduce power smoothly
- Watch runway end with peripheral vision, judge touchdown
- Touchdown: Hold elevator back pressure
- Apply brakes as needed, maintain centerline
|
- Crosswinds
- Windshear
- Go-arounds
- On centerline by 500'
- Stabilized by 300'
- Tailwinds
- Steep bank angles
- Overshooting
- Stall/spin
|
- Not correcting for wind drift
- Undershooting or overshooting final
- Steep banks in the pattern
- Poor coordination
- Stretching the glide
- Excess airspeed in flare
- Insufficient airspeed in flare
- Flaring too early, too late, too fast, or too slow
- Focusing too close during flare
- Not using aerodynamic braking
- Excessive wheel braking
|
- Approach speed: +10/-5 knots
- Touchdown: +400'/–0 ft (private)
|